
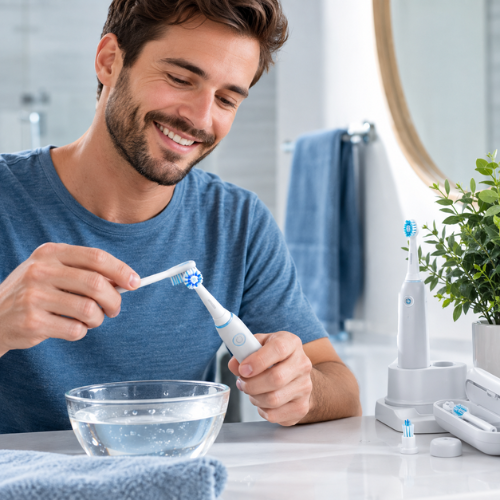
Your electric toothbrush cleans your teeth twice a day, 365 days a year. It removes plaque, toothpaste, food debris, and bacteria from your mouth.
And then, it keeps them.
On the bristles. In the spaces between the bristles. On the neck where the head meets the handle. On the charger contacts. In the grooves of the handle.
An observational study on electric toothbrushes used without any specific care protocol found significant bacterial biofilms on brush heads after just 3 weeks of use without proper cleaning. (Source: Journal of Dental Hygiene — microbial contamination of toothbrushes)
This is not an alarmist anecdote. It is a reality that directly affects your oral hygiene, your brush's lifespan, and its long-term performance.
This guide gives you the complete care protocol — daily, weekly, and monthly — for a brush that stays clean, effective, and durable.
Why maintaining your electric toothbrush is crucial
Reason 1 — Bacterial buildup
After each brushing, organic residue remains trapped between the bristles of the brush head. This residue — toothpaste, plaque, dead oral cells, saliva — creates the ideal nutrient-rich environment for bacterial growth.
In a bathroom at room temperature and with residual moisture on the bristles, bacteria actively multiply between brushings. An improperly rinsed head can contain millions of bacteria by the time of the next brushing.
Reason 2 — Toothpaste calcification
Toothpaste contains calcium carbonate and silica — abrasive agents that gradually build up and calcify in the spaces between the bristles and in the head's attachment neck. This calcified buildup reduces bristle flexibility and their ability to conform to the shape of the teeth.
Reason 3 — Corrosion of electrical contacts
The constant humidity in the bathroom, combined with toothpaste residue and limescale from tap water, speeds up corrosion of the metal contacts between the head and the handle, and between the charger and the handle. This corrosion creates electrical resistance that reduces energy transfer and can cause charging problems.
Reason 4 — Premature wear
Neglected maintenance significantly reduces the lifespan of your brush. Corroded contacts, a damp handle stored without drying, calcified deposits that stiffen the internal mechanisms — all factors that make an appliance designed to last 3 to 5 years age prematurely.
The complete care protocol — 3 levels
Level 1 — Daily care (2 minutes)
This is the foundation of the entire protocol. Done properly after each brushing, it prevents buildup that would otherwise require more intensive cleaning.
Step 1 — Rinsing the head (30 seconds)
Immediately after brushing, hold the head under a cool to lukewarm stream of water (never hot — heat can deform the bristles and stiffen the attachment neck).
Rotate the head under the stream while briefly turning on the motor — the vibrations help expel residue trapped between the bristles. Alternatively, gently brush the bristles with your thumb under running water.
Step 2 — Shaking off water (5 seconds)
Shake the brush vigorously (head facing down) to remove residual water from between the bristles. Do not tap the head against the sink — unnecessary mechanical shock to the bristles.
Step 3 — Wiping the handle (15 seconds)
Wipe the bottom of the handle (contact area) and the body of the handle with a clean, dry cloth. Pay particular attention to the head-handle junction where toothpaste accumulates.
Step 4 — Proper storage (5 seconds)
Place the brush head-up in a vertical holder, out in the open air. Never put a cap on the head between brushings — trapped moisture encourages bacterial growth.
What never to do after brushing:
| Incorrect action | Why it's a problem |
|---|---|
| Store with a closed cap | Trapped moisture → bacterial growth |
| Store head down | Water flows into the handle → electrical risk and corrosion |
| Store in a damp closed drawer | Possible mold on the bristles |
| Rinse with very hot water | Possible deformation of the bristles and neck |
| Dry with a hair dryer | Excessive heat → material degradation |
Level 2 — Weekly care (10 minutes)
Once a week, a deeper clean removes deposits that build up despite daily care.
Step 1 — Soaking the head (5 minutes)
Remove the head from the handle. Soak it in a glass containing one of these mixtures:
| Solution | Preparation | Effectiveness |
|---|---|---|
| Diluted white vinegar | 50% vinegar + 50% water | ✅ Excellent (limescale + bacteria) |
| Antiseptic mouthwash | Undiluted | ✅ Good (bacteria) |
| Baking soda | 1 tsp in a glass of water | 🟡 Fair (odors + light disinfection) |
| 3% hydrogen peroxide | Undiluted, 5 min maximum | ✅ Good (disinfection) |
Recommended duration: 5 minutes. Do not exceed 15 minutes for hydrogen peroxide — risk of bristle damage.
Step 2 — Cleaning the attachment neck (2 minutes)
The attachment neck (the fit between the head and the handle) is the area with the most calcified buildup. Use a cotton swab soaked in white vinegar to clean:
- The inside of the brush head neck
- The attachment post on the handle
- Visible grooves and crevices
Step 3 — Cleaning the charger (2 minutes)
Unplug the charger. With a cotton swab lightly soaked in white vinegar:
- Clean the charger’s metal contacts (limescale buildup and light oxidation)
- Wipe the charger base
- Dry with a dry cotton swab before plugging back in
Step 4 — Final rinse and drying (1 minute)
Rinse the head thoroughly under running water after soaking. Shake off residual water. Let it air-dry for 10 to 15 minutes before putting it back on the handle.
Level 3 — Monthly care (15 minutes)
Once a month, complete maintenance covers the whole device — handle, charger, contacts, and storage area.
Step 1 — Full handle cleaning (5 minutes)
Prepare a mild cleaning solution: a few drops of liquid soap in a glass of warm water.
Dip a microfiber cloth in this solution (never submerge the handle directly) and wipe the entire handle:
- Main body of the handle
- Control button(s) and their edges
- Head-handle junction area
- Base of the handle (charging contact area)
For grooves and crevices around the button: use a damp cotton swab.
Finish with a dry cloth to remove any residual moisture.
Step 2 — Limescale treatment for the contacts (3 minutes)
Limescale from tap water builds up on the metal contacts and gradually reduces charging efficiency. Once a month:
- Dip a cotton swab in pure white vinegar (undiluted)
- Gently rub the handle’s metal contacts (base)
- Rub the charger contacts
- Let sit for 2 minutes
- Wipe with a dry cotton swab
- Visually check that no white residue remains
Step 3 — Full visual inspection (5 minutes)
Use the monthly maintenance to inspect:
| Area inspected | What to look for | Action if found |
|---|---|---|
| Bristles on the head | Side splaying, flattening | Replace the head |
| Color indicator | Fading of the indicator | Replace the head |
| Handle contacts | Brown or green corrosion | Clean with vinegar + monitor |
| Seal (if visible) | Cracks, peeling | Contact customer service if under warranty |
| Handle | Cracks, deformities | Assess replacement |
| Head attachment neck | Excess play | Check compatibility or wear |
Step 4 — Cleaning the holder and storage area (2 minutes)
Clean the brush holder (if there is one) with the same soapy solution. Dry completely. A damp, dirty holder contaminates the clean brush as soon as it is placed there.
Special cases — Care adapted to your brush type
Electric bamboo brush
The bamboo handle requires a few specific precautions compared with a standard plastic handle.
What to do:
- Wipe the bamboo handle with a dry cloth immediately after each use
- Avoid leaving the bamboo handle soaking in water — bamboo can swell or crack with prolonged exposure
- Very occasionally (every 3 months), apply a thin layer of coconut oil or mineral oil to the bamboo handle to protect it from moisture
What not to do:
- Never submerge the bamboo handle in a bowl of water or under a prolonged stream
- Do not use harsh cleaning products on bamboo (bleach, concentrated alcohol)
Brush for people wearing dental appliances
If you wear braces, aligners, or other appliances, your brush comes into contact with areas that have more food debris. Increase the frequency of head rinsing:
- Rinse the head after each brushing (as standard)
- Also rinse after brushing the dental appliance if you use the same head
- Weekly soaking clean is especially important in this case
Brush shared between multiple heads
If you use the same brush with multiple heads (different profiles depending on needs), clean the attachment post carefully after each head change to avoid transferring residue from one head to another.
Signs your brush needs immediate deep cleaning
Do not wait for the weekly clean if you notice:
→ An unusually strong smell coming from the head
Indicates advanced bacterial growth. Immediate soaking in antiseptic mouthwash or white vinegar, then assess whether the head needs replacing.
→ Visible white deposits on the contacts
Accumulated limescale interfering with charging. Immediate cleaning with white vinegar on the contacts.
→ Signs of mold (black spots) on the head
Emergency situation. Replace the head immediately — mold cannot be completely removed by household cleaning on porous bristles.
→ A head that wobbles or lacks stability on the handle
Calcified deposits preventing proper fit. Deep clean the neck and post, then check whether the problem persists (mechanical wear in this case).
The annual care schedule — Summary
| Frequency | Action | Duration |
|---|---|---|
| After each brushing | Rinse head + wipe handle + proper storage | 2 min |
| 1x/week | Soak head + clean neck + clean charger | 10 min |
| 1x/month | Full handle care + contacts + visual inspection | 15 min |
| Every 12 weeks | Replace the brush head | 1 min |
| After any illness | Immediate head replacement | 1 min |
| 1x/year | General evaluation of the brush (battery, motor, contacts) | 10 min |
Conclusion — Regular care multiplies lifespan and performance
Caring for an electric toothbrush takes no more than 2 minutes a day, 10 minutes a week, and 15 minutes a month. In return, it ensures your brush performs at the level you bought it for — for its entire lifespan.
A properly maintained brush at 3 years old cleans just as well as when new. A neglected brush at 18 months can already underperform significantly — and become a source of bacteria rather than hygiene.
At DentalPro Smile™, our PureBrush Pro™ and NaturalBambou Pro™ brushes are designed to last — with corrosion-resistant contacts and materials suited to the humid bathroom environment. Our replacement heads are always available.
Discover the DentalPro Smile™ range → Free delivery · 1-year warranty · Replacement heads available.
👉 dentalpro-smile.com/fr-fr
❓ FAQ
1. Can you clean an electric toothbrush head in the dishwasher?
No. Dishwasher heat (usually 60 to 70°C) deforms the bristles of the brush head and can stiffen or warp the plastic attachment neck. Dishwasher detergents are also too harsh for brush head materials. Soaking in diluted white vinegar or mouthwash is clearly preferable and effective enough for regular maintenance.
2. Can white vinegar damage the bristles of the brush head?
Not for short soaks of 5 to 10 minutes in white vinegar diluted to 50%. White vinegar is acidic (pH ~2.5), but nylon bristles withstand brief exposure well. Prolonged soaking (several hours) or soaking in concentrated pure vinegar could theoretically affect the bristles over time. The 50/50 dilution and 5 to 10 minute duration are a safe and effective compromise.
3. Should the brush be cleaned differently if you have an active oral infection (canker sores, candidiasis)?
Yes. In the case of an active oral infection, increase the frequency of head cleaning to daily disinfection (5-minute soak in antiseptic mouthwash) rather than weekly. Replace the head as soon as the infection has healed. In the case of oral candidiasis, the brush head can harbor Candida albicans and cause recurrences if it is not replaced.
4. Can an IPX7 brush handle really be submerged in water?
The IPX7 rating guarantees water resistance against immersion up to 1 meter for 30 minutes under standardized test conditions. In practice, this means the handle can be rinsed under the tap and used in a damp environment without risk. However, for maintenance, it is not recommended to submerge it regularly in water — IPX7 is protection against accidents, not an invitation to immerse the device daily.
5. How do I know if my brush contacts are corroded?
Visually inspect the metal contacts (usually 2 small points or metal rings on the base of the handle and on the charger base). Light oxidation appears as dulling or a slight golden to brown discoloration. More advanced corrosion shows green deposits (copper oxide) or thick white buildup. Cleaning with white vinegar can treat mild cases — advanced cases signal the end of the brush's life or require contacting customer service if under warranty.
6. What is the lifespan of a well-maintained electric toothbrush versus a poorly maintained one?
The difference is significant. A brush properly maintained according to this article's protocol generally lasts 4 to 5 years with performance maintained. A brush without specific care — just rinsed after use — may see its contacts corrode as early as 18 to 24 months, its performance gradually decline, and require early replacement. Over 5 years, regular maintenance can therefore save the equivalent of one to two premature replacements.
Sources:
— Journal of Dental Hygiene — Microbial contamination of toothbrushes
— American Dental Association — Toothbrush care and storage : ada.org
— HAS — Oral health prevention recommendations : has-sante.fr
— Consumer Reports — Electric toothbrush maintenance guide
— ADEME — Household appliance maintenance guide : ademe.fr
Informational article only. Does not replace the advice of a dentist. DentalPro Smile™ — 2026.

Leave a comment
This site is protected by hCaptcha and the hCaptcha Privacy Policy and Terms of Service apply.