
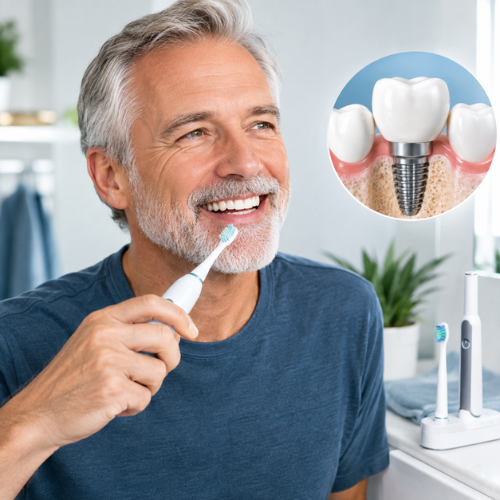
A dental implant costs between €1,500 and €3,000 per tooth depending on the practitioner and the region. It is the biggest dental investment an adult can make.
And like any investment, its lifespan depends on the care it receives.
Peri-implantitis — inflammation of the tissues around an implant, the equivalent of periodontitis for natural teeth — is the main cause of long-term implant failure. It affects around 22% of implant patients after 5 to 10 years, according to available data. (Source: Journal of Clinical Periodontology — prevalence of peri-implantitis)
In most cases, insufficient or improper oral hygiene around the implant is the direct cause.
So, can you use an electric toothbrush with implants? The answer is not only yes — in many cases, a sonic electric toothbrush is better than a manual toothbrush for implant patients. As long as you use the right technique, the right mode, and the right accessories.
This guide gives you everything you need to know.
Understanding the dental implant — What makes it different from a natural tooth
Before talking about brushing technique, it is crucial to understand why the implant requires special attention.
The structure of an implant vs. a natural tooth
| Component | Natural tooth | Dental implant |
|---|---|---|
| Root | Dentin root — living, vascularized | Titanium screw — inert, non-vascularized |
| Crown | Enamel + dentin | Ceramic or zirconia |
| Bone-root connection | Periodontal ligament (elastic living tissue) | Direct osseointegration (titanium-bone) |
| Adjacent gum | Natural epithelial attachment | Reduced epithelial attachment |
| Immune defense | Active local blood supply | Reduced around titanium |
What this difference means for hygiene:
A natural tooth is anchored in the bone by a periodontal ligament — an elastic tissue that absorbs mechanical shocks and has its own blood supply, which helps fight local infection.
The implant is in direct contact with the bone (osseointegration) — with no intermediate ligament. The gum around it has weaker epithelial attachment than around a natural tooth. This peri-implant gum is therefore less well protected against bacterial penetration and less effectively defended by the local immune system.
Direct consequence: bacterial plaque that would cause mild gingivitis on a natural tooth can cause more severe and faster peri-implantitis on an implant.
What is peri-implantitis?
Peri-implantitis is the infection of the soft and hard tissues (bone) surrounding a dental implant. It develops in two stages.
Stage 1 — Peri-implant mucositis: inflammation limited to the mucosa around the implant. Reversible with proper hygiene. Symptoms: redness, bleeding on probing, slight swelling.
Stage 2 — Peri-implantitis: the infection has progressed to the supporting bone. Irreversible without professional treatment. Symptoms: deep pocket around the implant, possible suppuration, bone loss visible on X-ray, implant mobility in advanced cases.
Peri-implant mucositis always comes before peri-implantitis — and is fully manageable with strict hygiene.
Electric toothbrush and implants — What implant specialists recommend
The question "can you use an electric toothbrush with implants?" has long divided practitioners. The available clinical data now provide a clear answer.
The current consensus
Implant specialists and periodontists mostly recommend sonic electric toothbrushes for dental implant patients — with two important nuances.
Nuance 1 — Sensitive mode is mandatory around the implant
The peri-implant area (the mucosa around the implant) is more delicate than the gum around a natural tooth. Clean mode at full power can be too intense for this area. Sensitive mode, with reduced vibrations, provides effective cleaning without traumatizing the peri-implant mucosa.
Nuance 2 — Minimal pressure around the implant
Even in Sensitive mode, the pressure applied around the implant must be lower than what is used on natural teeth. The pressure sensor is especially valuable for this profile.
Sonic vs. rotating brush for implants
| Criterion | Sonic brush | Rotating brush |
|---|---|---|
| Effect on peri-implant mucosa | ✅ Gentler (hydrodynamic effect) | 🟡 More intense direct mechanical action |
| Cleaning around the crown | ✅ Excellent | ✅ Good |
| Risk of tissue trauma | ✅ Low | 🟡 Moderate if pressure is not controlled |
| Implant specialist recommendation | ✅ Mostly preferred | 🟡 Acceptable with proper technique |
Verdict: the sonic brush in Sensitive mode is the preferred choice of implant specialists for implant patients.
Brushing technique around an implant — Step by step
Brushing around an implant requires a slightly adapted technique compared with standard brushing.
Before you begin
Identify your implant. A dental implant is recognized by its ceramic or zirconia crown — often slightly different from adjacent teeth in color or shape. The area that requires special care is the junction between the crown and the gum — this is where plaque builds up and peri-implantitis starts.
The step-by-step protocol
Step 1 — Select Sensitive mode
Before approaching the implant area, switch to Sensitive mode. You can use Clean mode on the other teeth, but always return to Sensitive for the peri-implant area.
Step 2 — Position at 45° toward the gum
Position the brush head at a 45° angle relative to the crown-gum junction — the same technique recommended for natural teeth. The bristles should lightly touch the gum line, not press against it.
Step 3 — Gently guide for 3 seconds
Guide the brush head around the implant crown for 3 to 4 seconds. Clean all sides of the implant: buccal side (cheek side), lingual side (tongue side), and proximal sides (side of adjacent teeth) with very light pressure.
Step 4 — Never press directly on the crown
Implant crowns in ceramic or zirconia are durable, but the junction between the crown and the implant screw can be sensitive to prolonged direct pressure. Move around it — not on it.
Step 5 — Finish with the water flosser
Brushing alone is not enough to clean the implant emergence profile (the area under the gum where the screw emerges). A water flosser with a special implant tip is essential.
The essential accessories for implant brushing
The electric toothbrush covers the accessible surfaces of the implant. But two critical areas require additional tools.
Accessory 1 — Water flosser with implant tip
The implant emergence profile — the area between the screw and the gum — is the most vulnerable area for bacterial colonization. A water flosser with a tip specially designed for implants (usually a soft rubber tip or a thin cannula) irrigates this area with a controlled water flow.
Water flosser protocol for implants:
- Use lukewarm water (never cold — the peri-implant mucosa may be sensitive)
- Start at the lowest pressure
- Aim the tip at the entrance of the peri-implant sulcus — not inside it
- Rinse each implant side for 2 to 3 seconds
- Never force the tip under the gum
Accessory 2 — Interdental brush
The spaces between the implant and adjacent teeth can be wider than between two natural teeth. An interdental brush of the correct size (test several sizes to find the one that fits without forcing) completes cleaning in these spaces.
Technique:
- Insert without forcing — if it resists, the size is too large
- Gentle back-and-forth motion — 2 to 3 passes per space
- Use daily, ideally in the evening
Accessory 3 — Special implant floss
For patients with very tight interdental spaces around implants, a variable-thickness floss (thicker in the middle, thinner at the ends) allows precise cleaning of the crown-gum junction. Some special implant flosses include a braided nylon section for cleaning under the pontic of implant bridges.
The 5 mistakes to absolutely avoid with implants
Mistake 1 — Using Clean mode at full power on the implant
Clean mode is designed for natural teeth with their shock-absorbing periodontal ligament. On an implant without a ligament, the same intensity can traumatize the peri-implant mucosa. Always switch to Sensitive mode on the implant area.
Mistake 2 — Neglecting interdental cleaning around the implant
This is the most common — and most dangerous — mistake. Plaque that builds up in spaces next to the implant is the main cause of mucositis and then peri-implantitis. Water flosser + interdental brush are non-negotiable.
Mistake 3 — Thinking that the implant "can't get cavities so it doesn't need brushing"
Exactly — the implant itself cannot get cavities (it is made of titanium and ceramic). But adjacent natural teeth can. More importantly, the gum and bone around the implant can develop peri-implantitis — often more aggressive than periodontitis around natural teeth.
Mistake 4 — Using very abrasive toothpaste on a ceramic implant
Toothpastes with a high RDA index (intensive whitening, activated charcoal) can abrade the ceramic of the implant crown, gradually dulling it and increasing plaque buildup. Use a standard fluoride toothpaste with a moderate RDA (< 70).
Mistake 5 — Skipping implant maintenance visits
Implants require more frequent professional maintenance visits than natural teeth — generally every 6 months with a dentist or periodontist for professional peri-implant cleaning. These visits make it possible to detect early mucositis before it progresses to peri-implantitis.
The complete daily routine for an implant patient
Morning — 7 minutes
| Step | Tool | Duration | Target area |
|---|---|---|---|
| 1 | Tongue scraper | 30 sec | Tongue |
| 2 | Sonic brush Clean mode | 90 sec | Natural teeth |
| 3 | Sonic brush Sensitive mode | 30 sec | Implant area |
| 4 | Interdental brush | 2 min | Spaces around implant |
| 5 | Water flosser on gentle mode | 2 min | Implant emergence profile |
Evening — 8 minutes
| Step | Tool | Duration | Target area |
|---|---|---|---|
| 1 | Sonic brush Clean mode | 90 sec | Natural teeth |
| 2 | Sonic brush Sensitive mode | 30 sec | Implant area |
| 3 | Interdental brush | 2 min | Spaces around implant |
| 4 | Water flosser on gentle mode | 3 min | Emergence profile + under the gum |
| 5 | Tongue scraper | 30 sec | Nighttime cleaning |
Warning signs — When to seek urgent care
| Sign | Urgency | Action |
|---|---|---|
| Bleeding around the implant when brushing | 🟡 Monitor | Improve hygiene + appointment in 15 days |
| Red and swollen gum around the implant | 🟡 Quick consultation | Appointment within the week |
| Pain when pressing on the implant | 🔴 Urgent | Appointment within 48h |
| Implant that moves slightly | 🔴 Urgent | Immediate appointment |
| Suppuration around the implant | 🔴 Urgent | Immediate appointment |
| Persistent bad taste around the implant | 🟡 Quick consultation | Appointment within the week |
Conclusion — Hygiene is the main determinant of your implant's lifespan
A dental implant properly placed by a qualified surgeon can last 20 to 30 years — even a lifetime. But that longevity is not automatically guaranteed. It depends on rigorous daily hygiene tailored to the implant.
The sonic electric toothbrush in Sensitive mode, combined with the water flosser with implant tip and the appropriate interdental brushes, is the optimal routine recommended by most implant specialists.
At DentalPro Smile™, our PureBrush Pro™ with Sensitive mode and pressure sensor, combined with our HydroJet Pro™ with special tip, make up the ideal combination for dental implant patients.
Discover the DentalPro Smile™ range → PureBrush Pro™ + HydroJet Pro™ · Free delivery · 1-year warranty.
👉 dentalpro-smile.com/fr-fr
❓ FAQ
1. Can you use an electric toothbrush right after implant placement?
No — during the initial healing phase (usually 2 to 6 weeks depending on the surgical protocol), your dentist will give you specific instructions. In most cases, they recommend gentle rinsing with diluted chlorhexidine and very careful brushing with a soft manual toothbrush in the operated area. The electric toothbrush — even in Sensitive mode — is usually reintroduced gradually after the initial healing period, on your surgeon's advice.
2. Can the vibrations of a sonic brush loosen an implant?
No. A properly osseointegrated implant (fused with the bone) can withstand chewing forces far greater than the vibrations of a sonic brush. The 750 Hz vibrations of the sonic brush are very low in amplitude and pose no risk to the osseointegration of a stable implant. If you feel mobility in your implant, it is a sign of a pre-existing osseointegration problem — unrelated to the type of brush used.
3. Do you need a special toothpaste for dental implants?
No — a standard fluoride toothpaste with a moderate RDA value (below 70) is perfectly suitable. Avoid very abrasive toothpastes (intensive whitening, activated charcoal) that can gradually abrade the ceramic of the implant crown. If your implant has special sensitivity, a toothpaste for sensitive teeth can be used.
4. Can peri-implantitis be cured with better hygiene?
It depends on the stage. Peri-implant mucositis (early stage, with no bone involvement) is reversible with a rigorous improvement in hygiene and professional peri-implant scaling. True peri-implantitis (with bone loss) requires professional treatment — decontamination of the implant surface, surgery in advanced cases. Improved hygiene stops progression but does not regrow bone that has already been lost.
5. Is a water flosser really essential with implants, or is brushing alone enough?
Brushing alone is not enough for implant patients. The implant emergence profile — the area between the screw and the gum — is inaccessible to any brush, manual or electric. This is exactly the area where bacteria responsible for peri-implantitis preferentially colonize. A water flosser with a suitable tip is the only tool that can irrigate this critical area. Most implant specialists consider the water flosser essential in the hygiene routine for implant patients.
6. Are maintenance visits really necessary if my hygiene is perfect?
Yes. Even with impeccable daily hygiene, calcified deposits gradually build up on the implant surface and in the peri-implant sulcus. These deposits can only be removed with professional instruments suitable for implants (plastic or carbon curettes so as not to scratch the titanium). In addition, professional maintenance allows early detection of beginning mucositis before it progresses — it is the most cost-effective preventive investment to protect your implant long term.
Sources:
— Journal of Clinical Periodontology — Peri-implantitis prevalence and prevention
— European Association for Osseointegration — Maintenance guidelines 2024
— American Academy of Periodontology — Peri-implant diseases guidelines
— HAS — Recommendations for dental implants: has-sante.fr
— Journal of Periodontology — Sonic toothbrush and peri-implant health
Informational article only. It does not replace the advice of a dentist or implant specialist. DentalPro Smile™ — 2026.


Leave a comment
This site is protected by hCaptcha and the hCaptcha Privacy Policy and Terms of Service apply.