
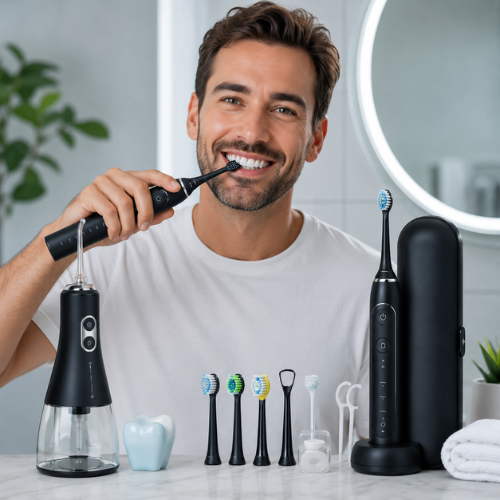
Ask yourself this honestly: have you ever actually learned how to brush your teeth?
Not watched someone do it. Not read an instruction leaflet. Really learned — with a technical demonstration, corrections, validation.
For the vast majority of French adults, the answer is no. Toothbrushing is one of the only health habits we practice every day from childhood without ever receiving structured training. We repeat what we saw done — and what we saw done was often inadequate.
The numbers confirm it: between 33% and 50% of French adults have at least one untreated cavity, and half of adults over 35 suffer from some form of periodontal disease. In most cases, these conditions have a common cause: brushing that is inadequate in technique or duration.
This guide gives you the exact method — step by step, area by area, second by second — for perfect brushing in 2 minutes with an electric toothbrush. Ready to use tonight.
Why technique matters as much as duration
Many people think brushing longer makes up for poor technique. That is false.
A 4-minute brush with incorrect technique systematically leaves the same areas uncleaned — the inner surfaces of the teeth, the gumline, the spaces between the molars. These areas build up plaque, which hardens into tartar, causes gum inflammation, and promotes cavities.
By contrast, 2 minutes with rigorous technique covers all tooth surfaces accessible to the brush — with clinically better results than 4 minutes of approximate brushing.
Technique, duration, and consistency form an inseparable triangle. This guide tackles the first side of that triangle — the one no one ever really taught you.
Preparation — What happens before putting the brush in your mouth
Choosing the right amount of toothpaste
The almost universal mistake is using too much toothpaste. Too much foam makes brushing uncomfortable, often leads to rinsing too early, which removes the protective fluoride, and gives a false sense of cleanliness.
The correct amount by age:
| Age | Amount | Visual reference |
|---|---|---|
| 6 months - 3 years | 0,1 g | Rice grain |
| 3 - 6 years | 0,25 g | Pea |
| 6 years and up | 1 - 1,5 g | Fingernail length |
| Adult | 1 - 1,5 g | Does not cover the whole head |
Wet the brush head
Run the brush head under cold water for 2 seconds before applying the toothpaste. The initial wetting slightly softens the bristles and helps them conform to the tooth surfaces. It also reduces the risk of abrasion in the first few seconds on dry, stiff bristles.
Put the brush in your mouth before turning it on
This is one of the corrections many new electric toothbrush users need to make. Turning the brush on outside the mouth sprays toothpaste everywhere. Place the head in your mouth, position it on the first teeth to be cleaned, then turn it on.
The 4-quadrant method — The exact protocol
The mouth is divided into 4 quadrants of 30 seconds each. This division ensures that each area gets equal attention — and that the full 2 minutes are respected without any need to count.
The 4 quadrants:
- Quadrant 1: Upper right (molars + premolars + upper right canine)
- Quadrant 2: Upper left (upper left canine + premolars + molars)
- Quadrant 3: Lower left (molars + premolars + lower left canine)
- Quadrant 4: Lower right (lower right canine + premolars + molars)
Your electric toothbrush timer signals the quadrant change every 30 seconds. If it does not, use your phone's stopwatch.
The 6 steps of perfect brushing — Full details
Step 1 — Outer surfaces (cheek side) — 60 seconds
This is the most intuitive area — the one you see in the mirror. But even here, technique makes all the difference.
Brush head position: at 45° relative to the tooth-gum junction. This angle directs the bristles partially under the gum edge, where plaque tends to accumulate.
Movement: none with a sonic or oscillating electric toothbrush. Position the head, let it vibrate for 2 to 3 seconds, move to the next tooth. Guide it — do not scrub.
Areas not to forget:
- The outer surface of the backmost molars (open your mouth slightly wider to reach them)
- The junction between the last molars and the terminal gum
- The area under the gumline (the 45° bristles reach it partially)
Duration: 30 seconds for the outer surfaces of the upper teeth (quadrants 1 and 2), 30 seconds for the outer surfaces of the lower teeth (quadrants 3 and 4).
Step 2 — Inner surfaces (tongue side and palate side) — 40 seconds
This is the most neglected area of the brushing routine. And this is exactly where tartar forms first — especially behind the lower incisors, directly opposite the sublingual salivary glands.
Brush head position: at 45° upward for the lower teeth (bristles pointing toward the gum), at 45° downward for the upper teeth.
Special technique for the lower incisors: slightly tilt the brush head vertically to fit it into the narrow corridor between the tongue and the incisors. Some electric toothbrushes offer a vertical head position — particularly useful here.
Duration: 20 seconds for the inner surfaces of the upper teeth, 20 seconds for the inner surfaces of the lower teeth.
Step 3 — Chewing surfaces (tops of the molars) — 20 seconds
The chewing surfaces of molars and premolars have grooves and cusps where plaque and food debris easily lodge.
Technique: place the head flat on the chewing surface. The bristles naturally enter the grooves under the effect of vibrations or oscillations. Move slowly from back to front.
Duration: 10 seconds for the upper molars, 10 seconds for the lower molars.
Step 4 — Upper incisors and canines — 10 seconds
These teeth are usually well cleaned by the previous steps, but deserve special attention for staining and the detail of the gum-tooth junction.
Technique: front position, slightly tilted to reach both the outer and palatal surfaces of the incisors in one motion.
Step 5 — The tongue — 15 seconds (outside the main timer)
The tongue is the main source of bad breath in 85 to 90% of cases. Cleaning it should be an integral part of any brushing routine.
Technique with an electric toothbrush: turn the brush off before moving to the tongue. The vibrating head can trigger a gag reflex on the back part of the tongue. Use the back of the brush head (if your model has one) or a dedicated tongue scraper — more effective than the brush for this area.
Technique with a scraper: stick out your tongue, place the scraper as far back as possible without triggering the gag reflex, apply light pressure, and pull forward. Repeat 3 to 5 times, rinsing the scraper between passes.
Step 6 — Gums and palate — 15 seconds (optional but recommended)
The palate and gums also harbor bacteria and dead cells. A light pass with the brush (turned off or in Sensitive mode) or a soft brush cleans these surfaces and stimulates local blood circulation.
The full minute-by-minute protocol
To make this guide fully actionable, here is the second-by-second flow of your optimal brushing.
| Time | Action | Area |
|---|---|---|
| 0:00 - 0:30 | Brush in mouth, Clean mode, 45° | Outer upper surfaces (quadrants 1+2) |
| 0:30 - 1:00 | Timer signal → switch | Outer lower surfaces (quadrants 3+4) |
| 1:00 - 1:20 | 45° inward repositioning | Inner upper surfaces |
| 1:20 - 1:40 | Continue inside | Inner lower surfaces |
| 1:40 - 2:00 | Flat position | Upper + lower chewing surfaces |
| 2:00 | Timer stops → end of brushing | |
| +15 sec | Brush off or scraper | Tongue (back to front) |
| +15 sec | Optional | Gums and palate |
Total: 2 minutes 30 seconds for a complete brushing.
The 5 chronically neglected areas — Critical check
Even with good overall technique, some areas are consistently under-treated. Check each one during your next brushing.
Area 1 — The inside of the lower incisors
Behind the 6 lower front teeth, facing the tongue. This is where tartar forms first for most adults. The tongue makes access difficult and reduces the time most people spend there.
Solution: slightly tilt the brush head vertically to fit into this narrow space.
Area 2 — The distal side of the last molars
The back surface of the last molar (the side facing the throat) is often partially or completely ignored. It is hard to reach and uncomfortable to access.
Solution: open your mouth wider to create space. Place the brush head behind the last molar and let it vibrate for 3 to 4 seconds.
Area 3 — The gumline
The space between the gum and the tooth (gumline) is the area where plaque causes the most inflammation — and therefore bleeding. A 45° angle directed toward the gums is essential to reach it.
Solution: always check your brush angle. If the bristles point parallel to the tooth (vertical), you are not cleaning the gumline. Tilt until you feel the bristles slightly "sink" under the gum edge.
Area 4 — The chewing surfaces of the premolars
Premolars (between the canines and molars) have complex chewing surfaces with cusps and grooves. They are often rushed through in the sweeping motion toward the molars.
Solution: spend 2 to 3 specific seconds on each premolar when cleaning chewing surfaces.
Area 5 — The junction between adjacent teeth
The electric toothbrush cleans tooth surfaces but cannot get between them. Those are the interdental spaces — which only a water flosser or floss can clean effectively.
Solution: systematically complete brushing with a water flosser or floss. This is not optional — it is the essential complement to brushing to cover the 40% of tooth surfaces inaccessible to any brush.
Adjustments based on your profile
If you have sensitive or bleeding gums
Use your electric toothbrush's Sensitive mode for the first 2 to 4 weeks. Reduce pressure further — if your gums bleed when brushing, it is often because inflamed plaque is present, not because the brush is too hard. Keep brushing gently — bleeding decreases when plaque is removed regularly.
If you wear braces
Divide your brushing into 6 areas instead of 4 quadrants. Add a specific area above the brackets and a specific area below the brackets for each arch. Use an orthodontic V-shaped bristle head if available for your model. Count 3 to 4 minutes instead of 2 — and always finish with a water flosser.
If you have dental implants
Use Sensitive mode around the implant area. Avoid pressing directly on the implant-gum junction. A water flosser with a special implant tip is essential as a complement to clean the emergence profile.
If you have removable partial dentures
Remove the denture before brushing your natural teeth. Brush the natural teeth normally according to this protocol. Clean the denture separately with an ultrasonic cleaner or effervescent tablets — never with abrasive toothpaste.
Conclusion — 2 minutes well used are worth 4 minutes poorly used
Brushing technique is not an extra burden. It is the sine qua non condition for your investment in a quality electric toothbrush to produce the expected results.
Apply this protocol tonight. In 7 days, your gums will thank you: less bleeding, less sensitivity, a feeling of cleanliness that lasts longer during the day.
In 30 days, your dentist will notice.
At DentalPro Smile™, our PureBrush Pro™ and NaturalBambou Pro™ brushes include a 2-minute timer with quadrant signals every 30 seconds, a pressure sensor, and 5 modes adapted to every situation — the perfect tools to apply this protocol from the very first night.
Discover the DentalPro Smile™ range → Free delivery · 1-year warranty · Visible results in 7 days.
👉 dentalpro-smile.com/fr-fr
❓ FAQ
1. Should you brush your teeth before or after breakfast?
Both approaches have clinical supporters. Brushing before breakfast removes overnight plaque before it comes into contact with food sugars, and avoids the issue of brushing after an acidic meal. Brushing after removes meal residue. The main recommendation in France is to brush after the meal — waiting 30 minutes if the meal contained acidic foods (fruit juice, coffee, yogurt). The key is to brush twice a day without exception.
2. Is the 45° technique the same for all teeth?
Yes for the outer and inner surfaces of all teeth — the 45° angle relative to the tooth-gum junction is universal. It only changes for chewing surfaces (flat on the grooves) and for the lower incisors where a slight vertical tilt of the head makes it easier to reach the narrow lingual space.
3. My dentist told me to brush in circles — is that compatible with an electric toothbrush?
Circular brushing (the modified Bass method) was developed for the manual toothbrush. With a sonic or oscillating electric toothbrush, the circular motion is generated automatically by the motor. Your role is limited to positioning the head correctly at 45° and moving it slowly — the motor does the circles for you, far more consistently and effectively than you could do manually.
4. Is it normal for my gums to bleed when I improve my brushing technique?
A slight temporary bleeding during the first few days of improved technique is normal — you are reaching areas inflamed by the buildup of existing plaque. This bleeding should gradually decrease over 7 to 14 days. If bleeding persists or worsens after 2 weeks of correct brushing, see your dentist — it may signal established gingivitis requiring professional scaling.
5. Can you brush your teeth more than 2 times a day?
Brushing 3 times a day is recommended in certain situations: after every meal for people with braces, for people at high cavity risk, or during certain dental treatments. Outside these specific cases, 2 daily brushings (morning and evening) are enough if the technique is correct. Brushing more often without a medical reason can irritate the gums and increase bristle wear.
6. What is the difference between brushing your teeth and using a water flosser — which should you do first?
The recommended sequence is: electric brushing first, then water flosser. Brushing loosens and removes plaque from accessible tooth surfaces. The water flosser then removes residue from interdental spaces and under the gums. This sequence is more effective than the reverse, because prior brushing reduces the overall bacterial load before the flosser treats the remaining areas.
Sources:
— HAS — Oral health prevention recommendations: has-sante.fr
— American Dental Association — Brushing technique guidelines: ada.org
— Journal of Clinical Periodontology — Bass technique and modified Bass
— French Society of Periodontology — Interdental hygiene recommendations
— paymed.pro — Oral health in France 2026
Informational article only. Does not replace the advice of a dental surgeon. DentalPro Smile™ — 2026.

Leave a comment
This site is protected by hCaptcha and the hCaptcha Privacy Policy and Terms of Service apply.